Foldable Bean (or Hybrid) by Willem van de Pol
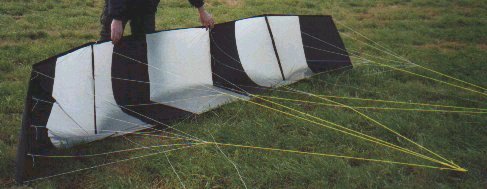
Just unfold and fly !!
See also Vlieger.
Nederlandse versie staat hier.

The foldable Bean
One of the kites from"The Handbook" that I builded straight away was the Bean. It flew perfect. A disadvantage was that the leading-edge had to assembled and disassembled when I flew the kite. Would a more convenient way be possible ? Then I had an idea on how I could make it foldable. The first attempt worked great and had some unexpected advantages: the kite started like a C-Quad and the leading edge and battens have a less tendency to break. Then I started to simplify my idea with the following result.
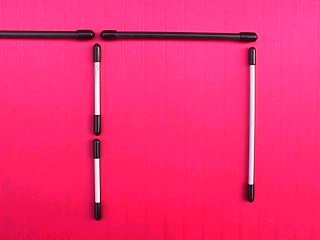
The principle
To make a kite foldable you need hinge-joint that allows folding in any direction and also completely double up. You can not place a hinge just any where. They need support in order to prevent strange curves or dents in the fabric. Therefore a hinge can only be placed at the bridle-points off the kite. The hinge-joint consists of 2 or more bars (battens, tubes, spars) from which each lays with its soft pvc end-cap more or less against the other. They are only separated from each other by their own closed (sewed) tunnel. That is all. With the help off a bridle-bridge made from 12 cm bridle-line the original bridle-point is split into 2 bridle-points (battens only). The tunnels are closed (sewed) in such a way that the leading-edge is pushed to the outside of its tunnel and a batten to the centre of its tunnel.
Rectangular shaped panels with a batten at each long side and one batten at a short
side can not be folded. That is only possible with the battens at the short side and
only one at the long side. Thus the battens that are longer then the width of one of
the panels next to them must be made foldable starting from the centre batten(s) of
the kite and then going to the outside. For a Bean with 5 battens only the centre
batten needs to be foldable at the one but last bridle-point from the bottom.
For a Bean with 6 battens these are the 2 centre battens at the middle bridle-point
and the battens next to them at their one but last bridle-point from the bottom (or
all 4 battens at their middle bridle-point). For both Beans (5 or 6 battens) the
outer battens are never foldable. The leading-edge is foldable at each batten.
My latest Bean has all battens foldable, except both outer battens, at their middle bridle-point.
This allows the panels to be folded double with the bridle lines nicely in between. And a
new mechanism is used to lock/unlock the foldable battens.
 This setup works fine but
|
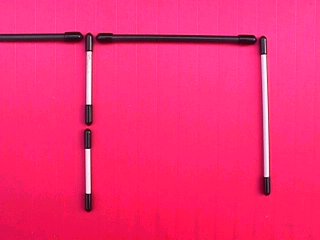 this setup is better
|
|
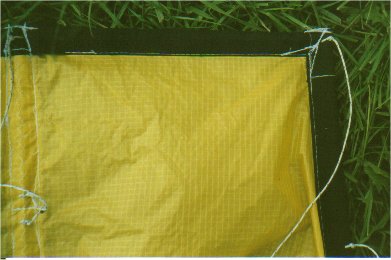 Check stitch work |

Upgrading an existing Bean
Remove the leading edge and all battens. Close (sew) the leading edge tunnel at each batten tunnel (in the middle). Close the batten tunnel at the bridle point where the batten should be foldable. The leading edge tunnel has now as many separate tunnel parts as there are sail panels. Some batten tunnels consist now out of 2 separate tunnels. Cut openings in the tunnels with an electric welding tool so that the leading edge/batten can slide back through this opening into its own tunnel. Cut the leading edge into parts to fit the leading edge tunnel parts in such a way that when they are put back into the tunnel, with end-caps mounted at each end, they just fit tight. Do the same for the battens that will be foldable. When all leading/edge/battens are back in there tunnel we make from 12-20 cm bridle a kind of bridle bridge. This bridge connects the two batten parts (just behind the end-cap). This bridle-bridge replaces the original bridle point (which is now a cut batten in 2 closed tunnels). Connect the original bridle to the centre of the bridle bridge. Adjust the length of the bridle as described in "the Handbook". The leading edge does not need bridle-bridges.
Building a new Bean
Reinforcements, preferable kevlar reinforced mylar, are required at each tunnel end (2 per tunnel). In my latest version I only use a double layer of tunnel ribbon without using kevlar reinforced mylar. The foldable batten and leading edge tunnels are split into 2 or more tunnel parts or better separate tunnels. Each having 2 ends which requires reinforcement. Before sewing the tunnels with reinforcement on the fabric you have to consider where you want your tunnel openings, through which the batten or leading edge will slide into its tunnel.
One way is to simply sew the reinforcement to the tunnel ribbon, then fold the ribbon double and sew it to the fabric. Finally cut an opening in it with an electric welding tool.
Another approach is to sew one side of the tunnel to the fabric (middle of the tunnel on outer edge of the fabric) then fold the tunnel and sew it to the fabric (at tunnel lower edge). Stop sewing where you want your openings.
For the leading edge you can take 6 mm Exel Strong.
The End
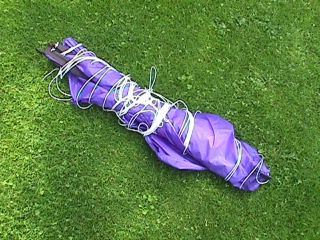
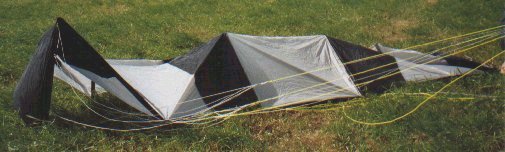
After you have made a foldable Bean you will be afraid that it never will fly. Will the bridle work ? It really looks like a disaster. Before you go out and fly, first check the bridle using the method as is described in "the Handbook". While checking the bridle of the foldable battens use a wooden shelf or stick very close along the foldable batten for extra support. Folding a Bean is simple, from left to right or right to left: fold outer batten to leading edge, that to batten, that to leading edge and so on.
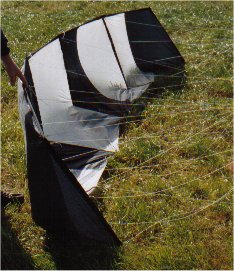
From experience I know that every kiter will warn you that your kite's batten or leading edge is broken. They just don't know that it should look like that and that it flies like that.
Willem van de Pol, Druten. Text Frans Nijhuis.